
Hohner Melodica Professional restoration
- This topic has 0 replies, 1 voice, and was last updated 5 years, 5 months ago by
Clep.
-
AuthorPosts
-
November 2, 2018 at 10:01 pm #10399
Clep
ParticipantHi!
A while back Alan was kind enough to sell me a HMProf for parts (it’s the one described here). I decided I would try to restore it, and I finally found some time.
I went through and replaced all the gaskets, checked for leaks, etc, but it still had a huge leak (as Alan describes in the other thread). Turns out it was the reed bed: the top wooden plate delaminated from the base.
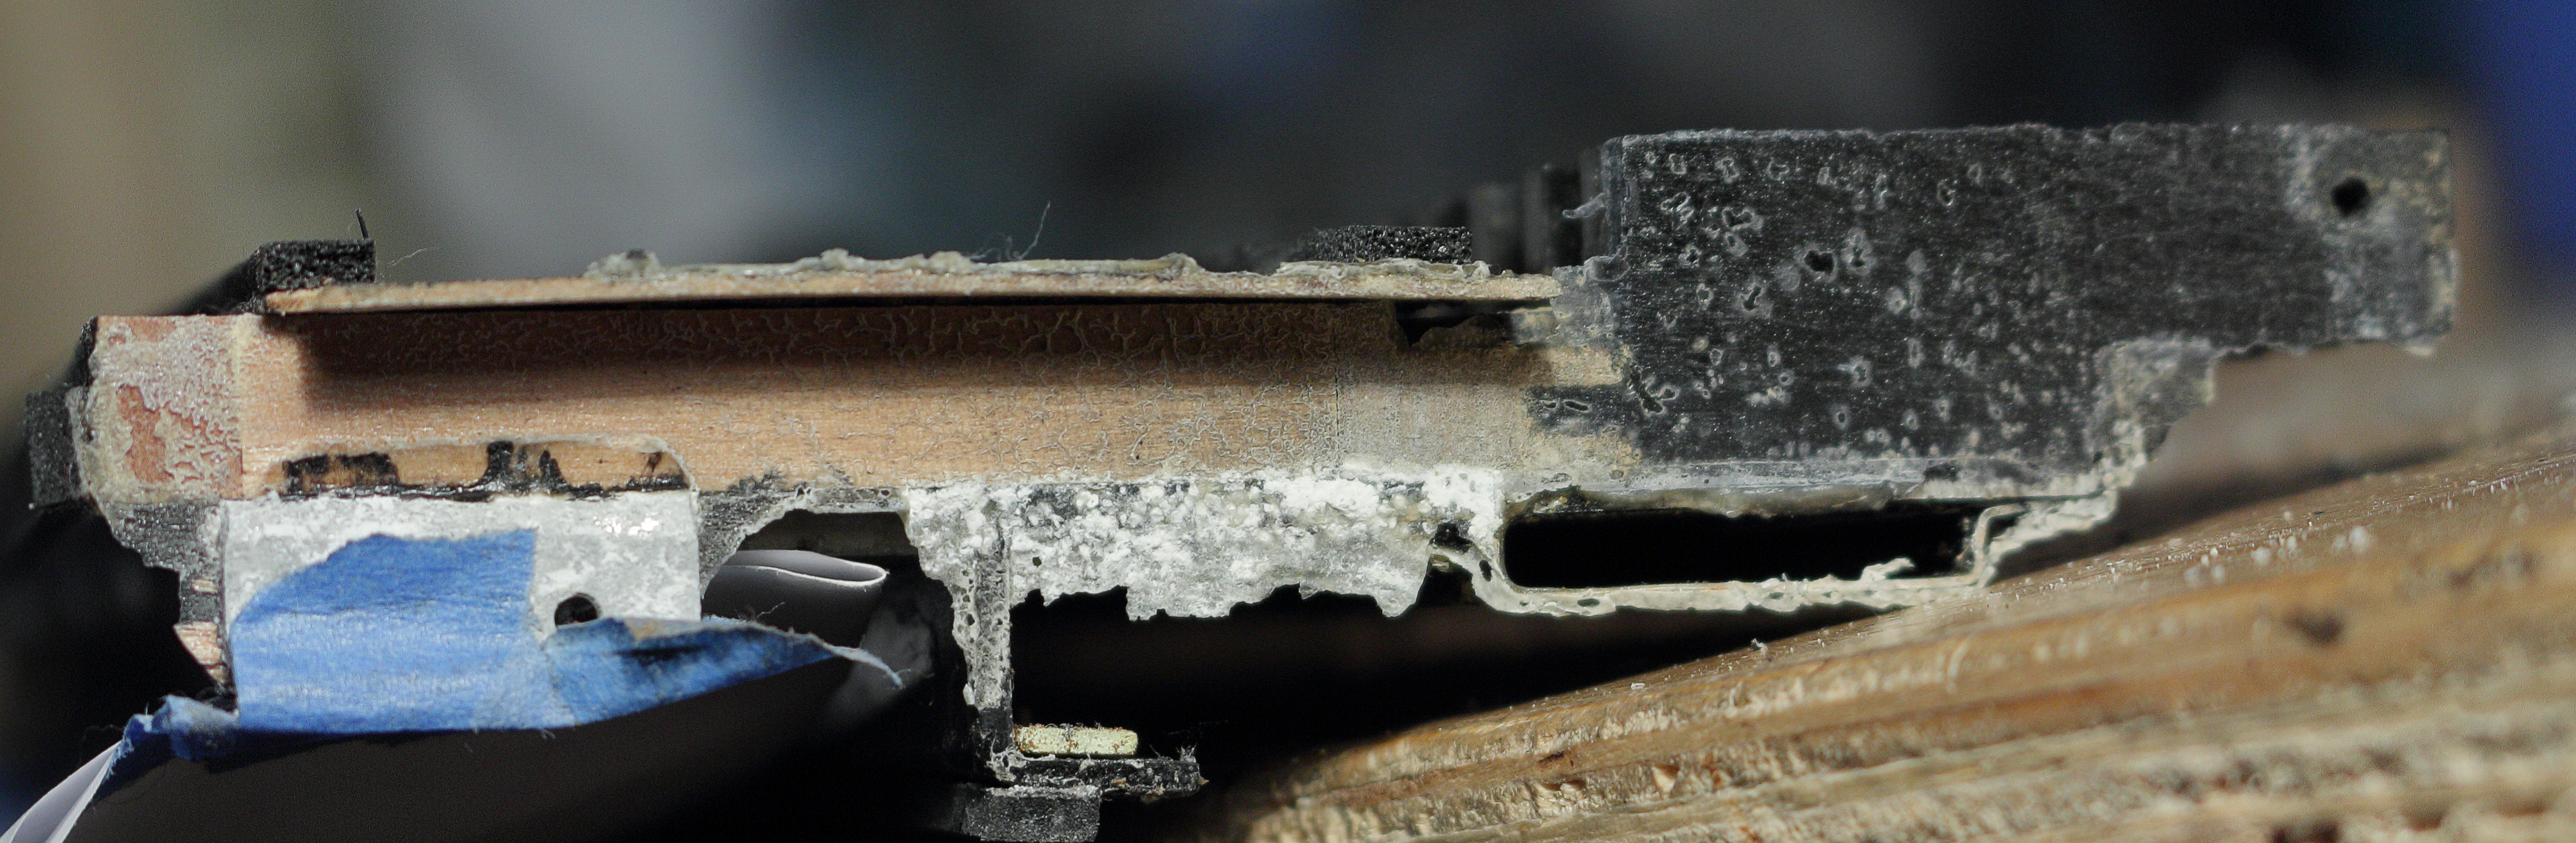
The surprising thing to me is that the top wood plate is only 1mm thick! (measured with calipers) Perhaps that is for acoustic reasons; otherwise it seems crazy how thin it is. Also, it is not glued to the reed bed at all, it’s just sitting on there, and held down on one side with the screws that hold the “guide rail” in place (i.e. the small arms that keep the keys straight). It is apparently “glued” to the reed bed only by the black glue/paint/coating that is sprayed inside the reed chambers. You can see this in the pictures: the wood is totally clean/dry/glue-free where it contacts the reed bed.
This black coating had detached on the treble side of the melodica, so it was impossible to play. These melodicas have a reputation of needing lots of wind to play; I’m now wondering if part of the reason is that they get cracks in this 1mm wood veneer. (It also has lots of fine cracks in it, which you can see in the pictures.) The rest of the melodica was well sealed; the valve pads seem good, the reeds are in excellent condition. Anyway, time will tell, but I’m tempted to take apart my other HMProf now to see if there are any cracks to be sealed.
A couple questions:
1 – I thought I might replace the wood veneer with a new sheet of wood; I thought I might use cedar for this, for rot resistance. Does the black coating from the factory serve as a moisture barrier? Can I use raw unprotected wood or would that be a mistake? Then I would spread glue over all of the reed bed (for tight air sealing) and clamp the veneer to it to cure. I’m just not sure how careful I need to be about moisture in the wood of the reed chambers, and obviously the less moisture that gets in to the wood veneer, the better.
2 – I’m tempted to slightly widen the holes in all the keys to make re-insertion of the wire rod easier (I am dreading it). It doesn’t seem like there would be any down side to this: I believe the keys are held against the wire rod with leverage from the spring, so there wouldn’t be any clicking. Am I missing anything here?
Here are some pictures to add to the collective internet knowledge of these melodicas:
——————–I made a metal piece to cover the overall reed chamber for leak testing; worked ok:
All the keys removed:
You can see the delamination of the veneer here:
Veneer removed:
I haven’t seen the ends of the central section pictured, so here are a couple pictures:

(High-res here)

(High-res here)And in case anyone is interested, here is the first airway that passes down the body of the instrument with the cover removed; I shouldn’t have done this because it was perfectly sealed, but I was desperately trying to find leaks:
Other general notes, in case they are helpful to others:
– I read or heard somewhere that the HMProf reeds were brass, despite their color, but they are steel (or at least something ferromagnetic: they are strongly attracted by magnets. The reed plate seems like aluminum or something similarly non-magnetic.
– the spit valve thread fits 3/8″-16 fittings (same spit valve as the HMPianos); I used a 3/8-16 brass cap and it works great
– the bolts along the center line of the back seem to be 2mm x 8mm (2mm x 12mm might fit too). I had to drill out and thread tap one of these holes because it had been fouled; I went to 6-32 and it worked fine. It might even be a good idea to just do this for all the holes, since the tiny bolts are difficult to use.
– #0-3/8 and #1-3/8 wood screws are about right for replacing any corroded screws
-
AuthorPosts


- You must be logged in to reply to this topic.